Link for Safes & Key Cabinets
User Guide
Table of Contents
Getting Started
Activating the Safe
Device Alarm Set Up
Adding a User
Access Methods
Adding a Card to User
Adding a User ID to User
Adding a PIN to User
How to Use Remote Authorization
Group Management
Mobile Authenticator Setup
Forgot Password
Appendix A: ACM Sync
Statutory Declarations of Conformity
Getting Started
Below are step-by-step instructions to activate your safe/key cabinet.
Ensure your Link account has been created.
Upon purchasing a hardware, an email was sent to you that included a username, password and subdomain that you will need to gain access to the Console.
Search ‘BioConnect Link’ in your inbox for your credentials to find an email from hello@bioconnect.com.
Types of Safes/Key Cabinets
Key Cabinets come with a Swing Lock (enables card and mobile). Safes offer two types of access devices: one safe offers Card, PIN, and Mobile access, the other offers Card, PIN, Fingerprint and Mobile access.

Safe
Card, PIN and Mobile

Safe
Card, PIN, Fingerprint and Mobile

Key Cabinet
Card and Mobile
Activating the Safe / Key Cabinet
Overview
For this step, a laptop or smartphone, the Medixsafe hardware and internet connection is required. The Link device will be activated by adding it to the BioConnect Link Console.
Power the Safe / Key Cabinet
You will be powering the device using 12VDC.
Adding a Link to Your Account
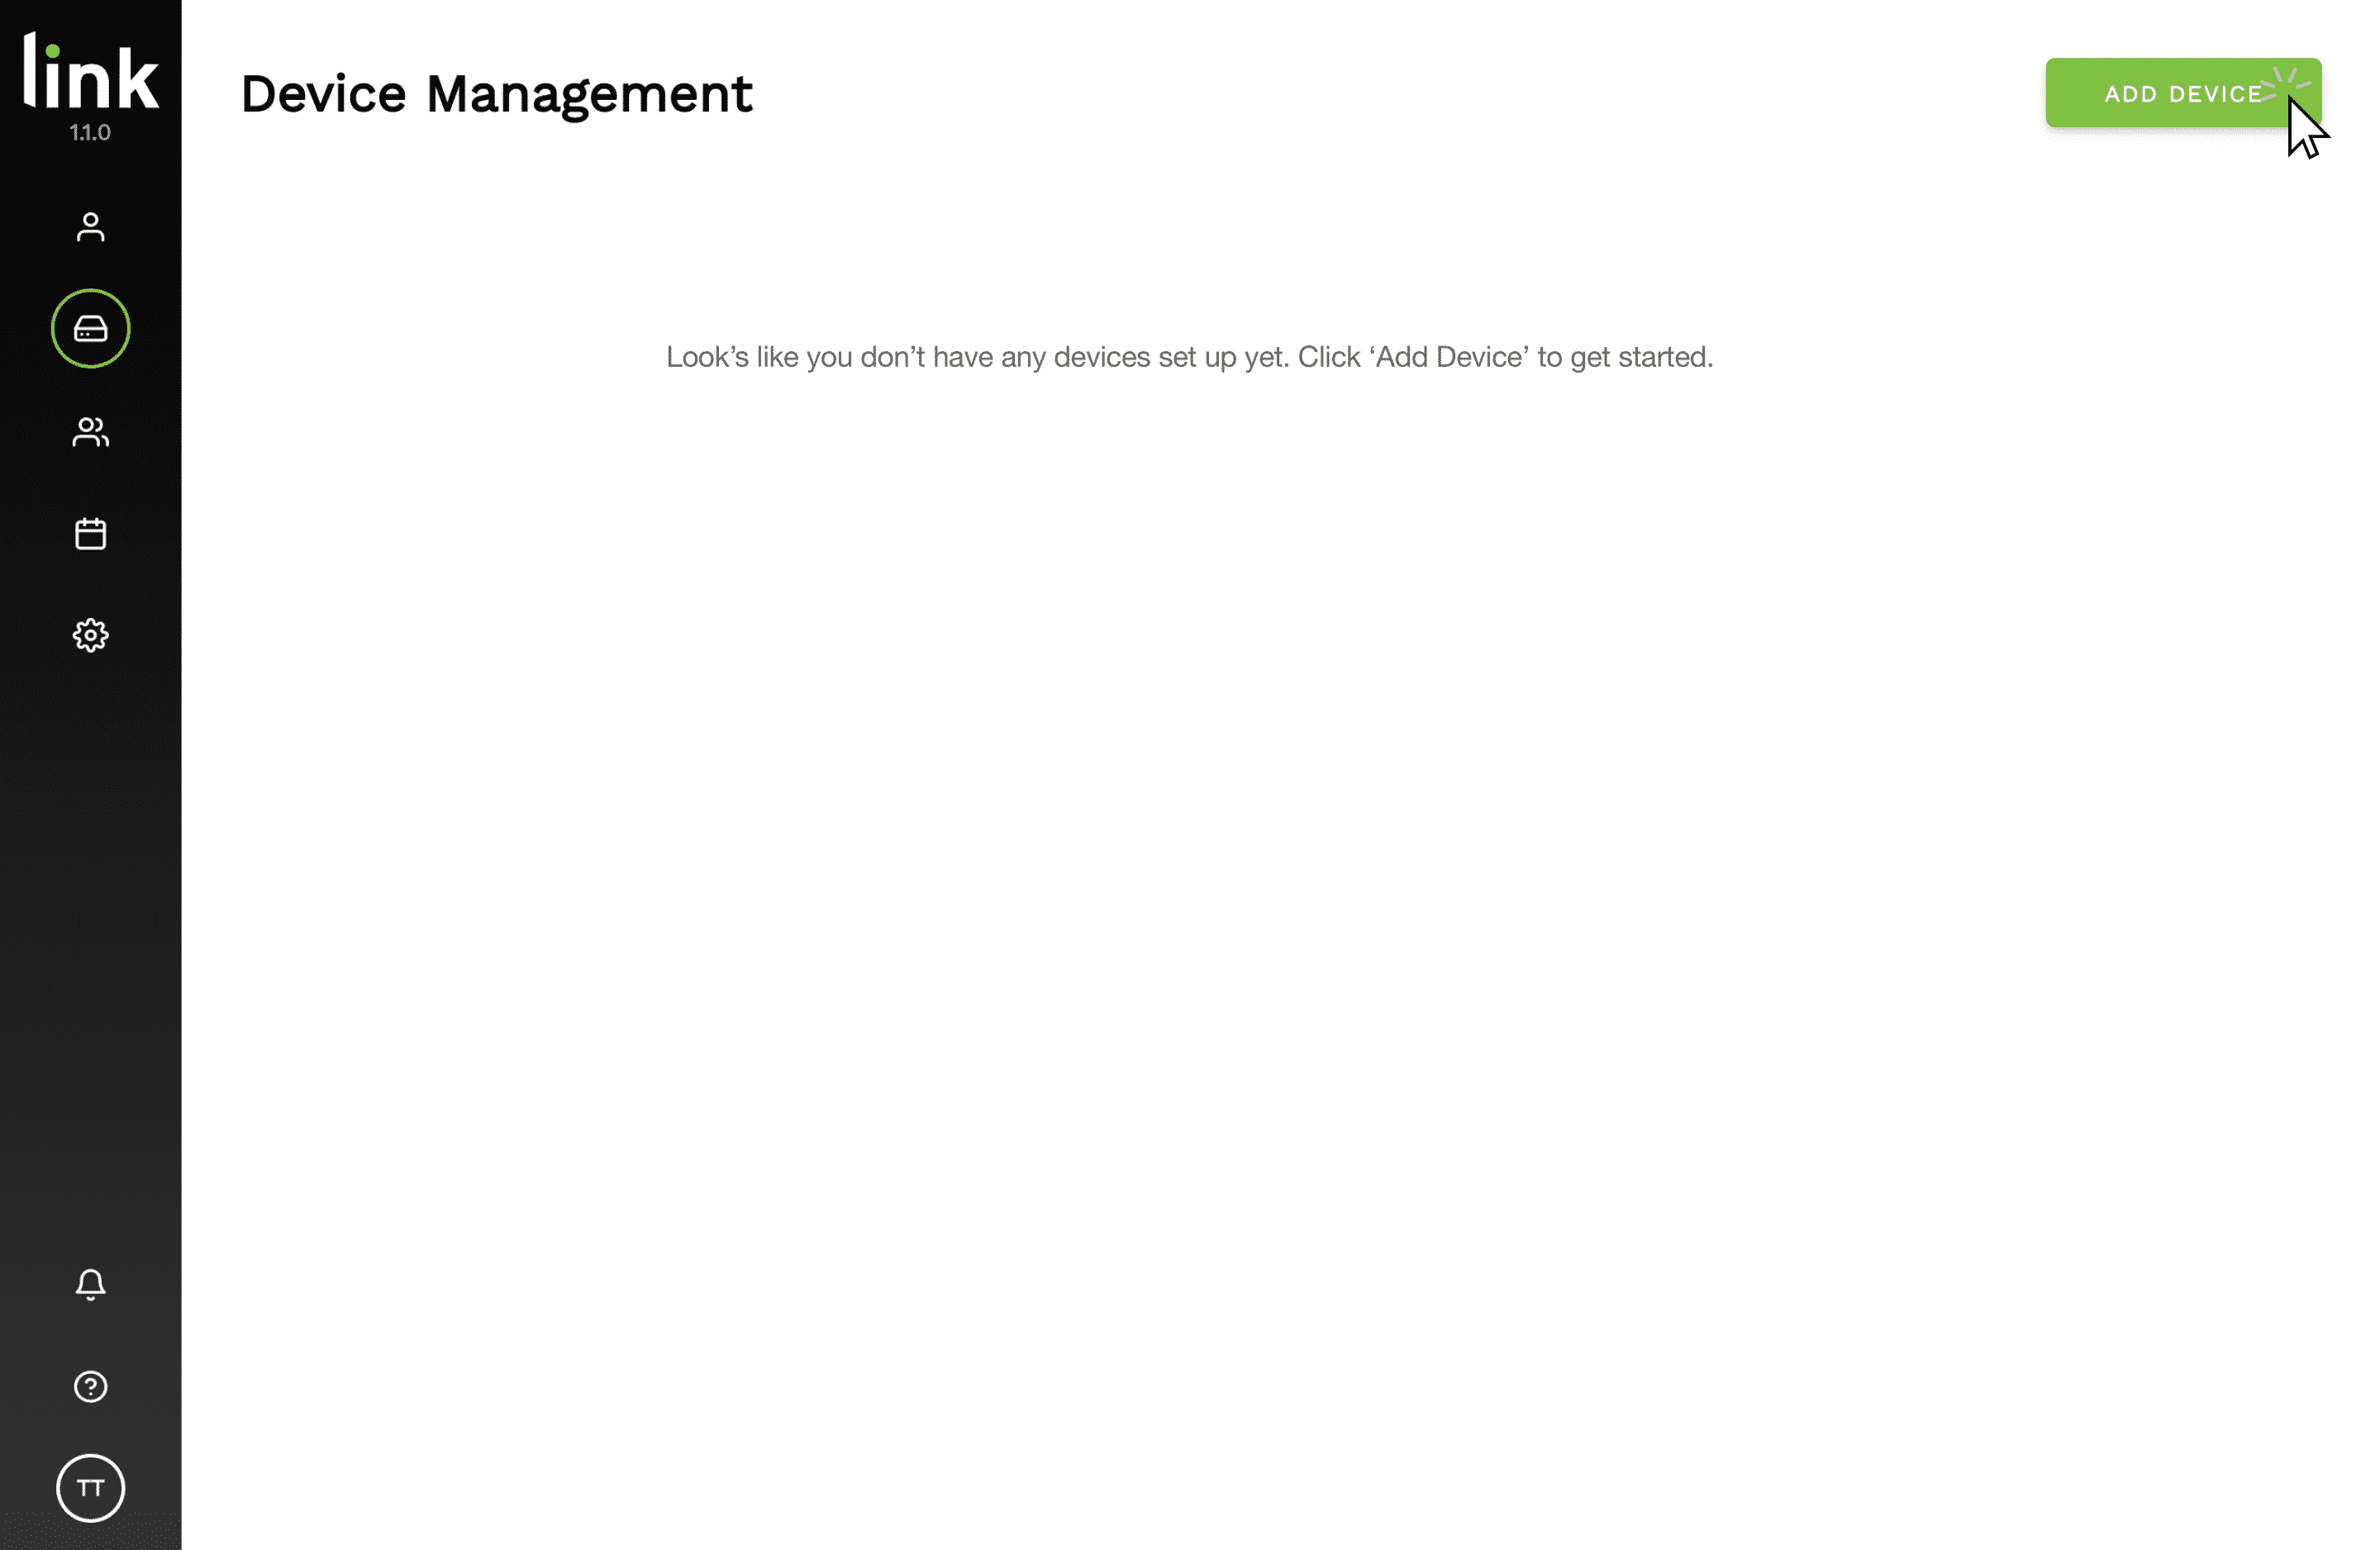
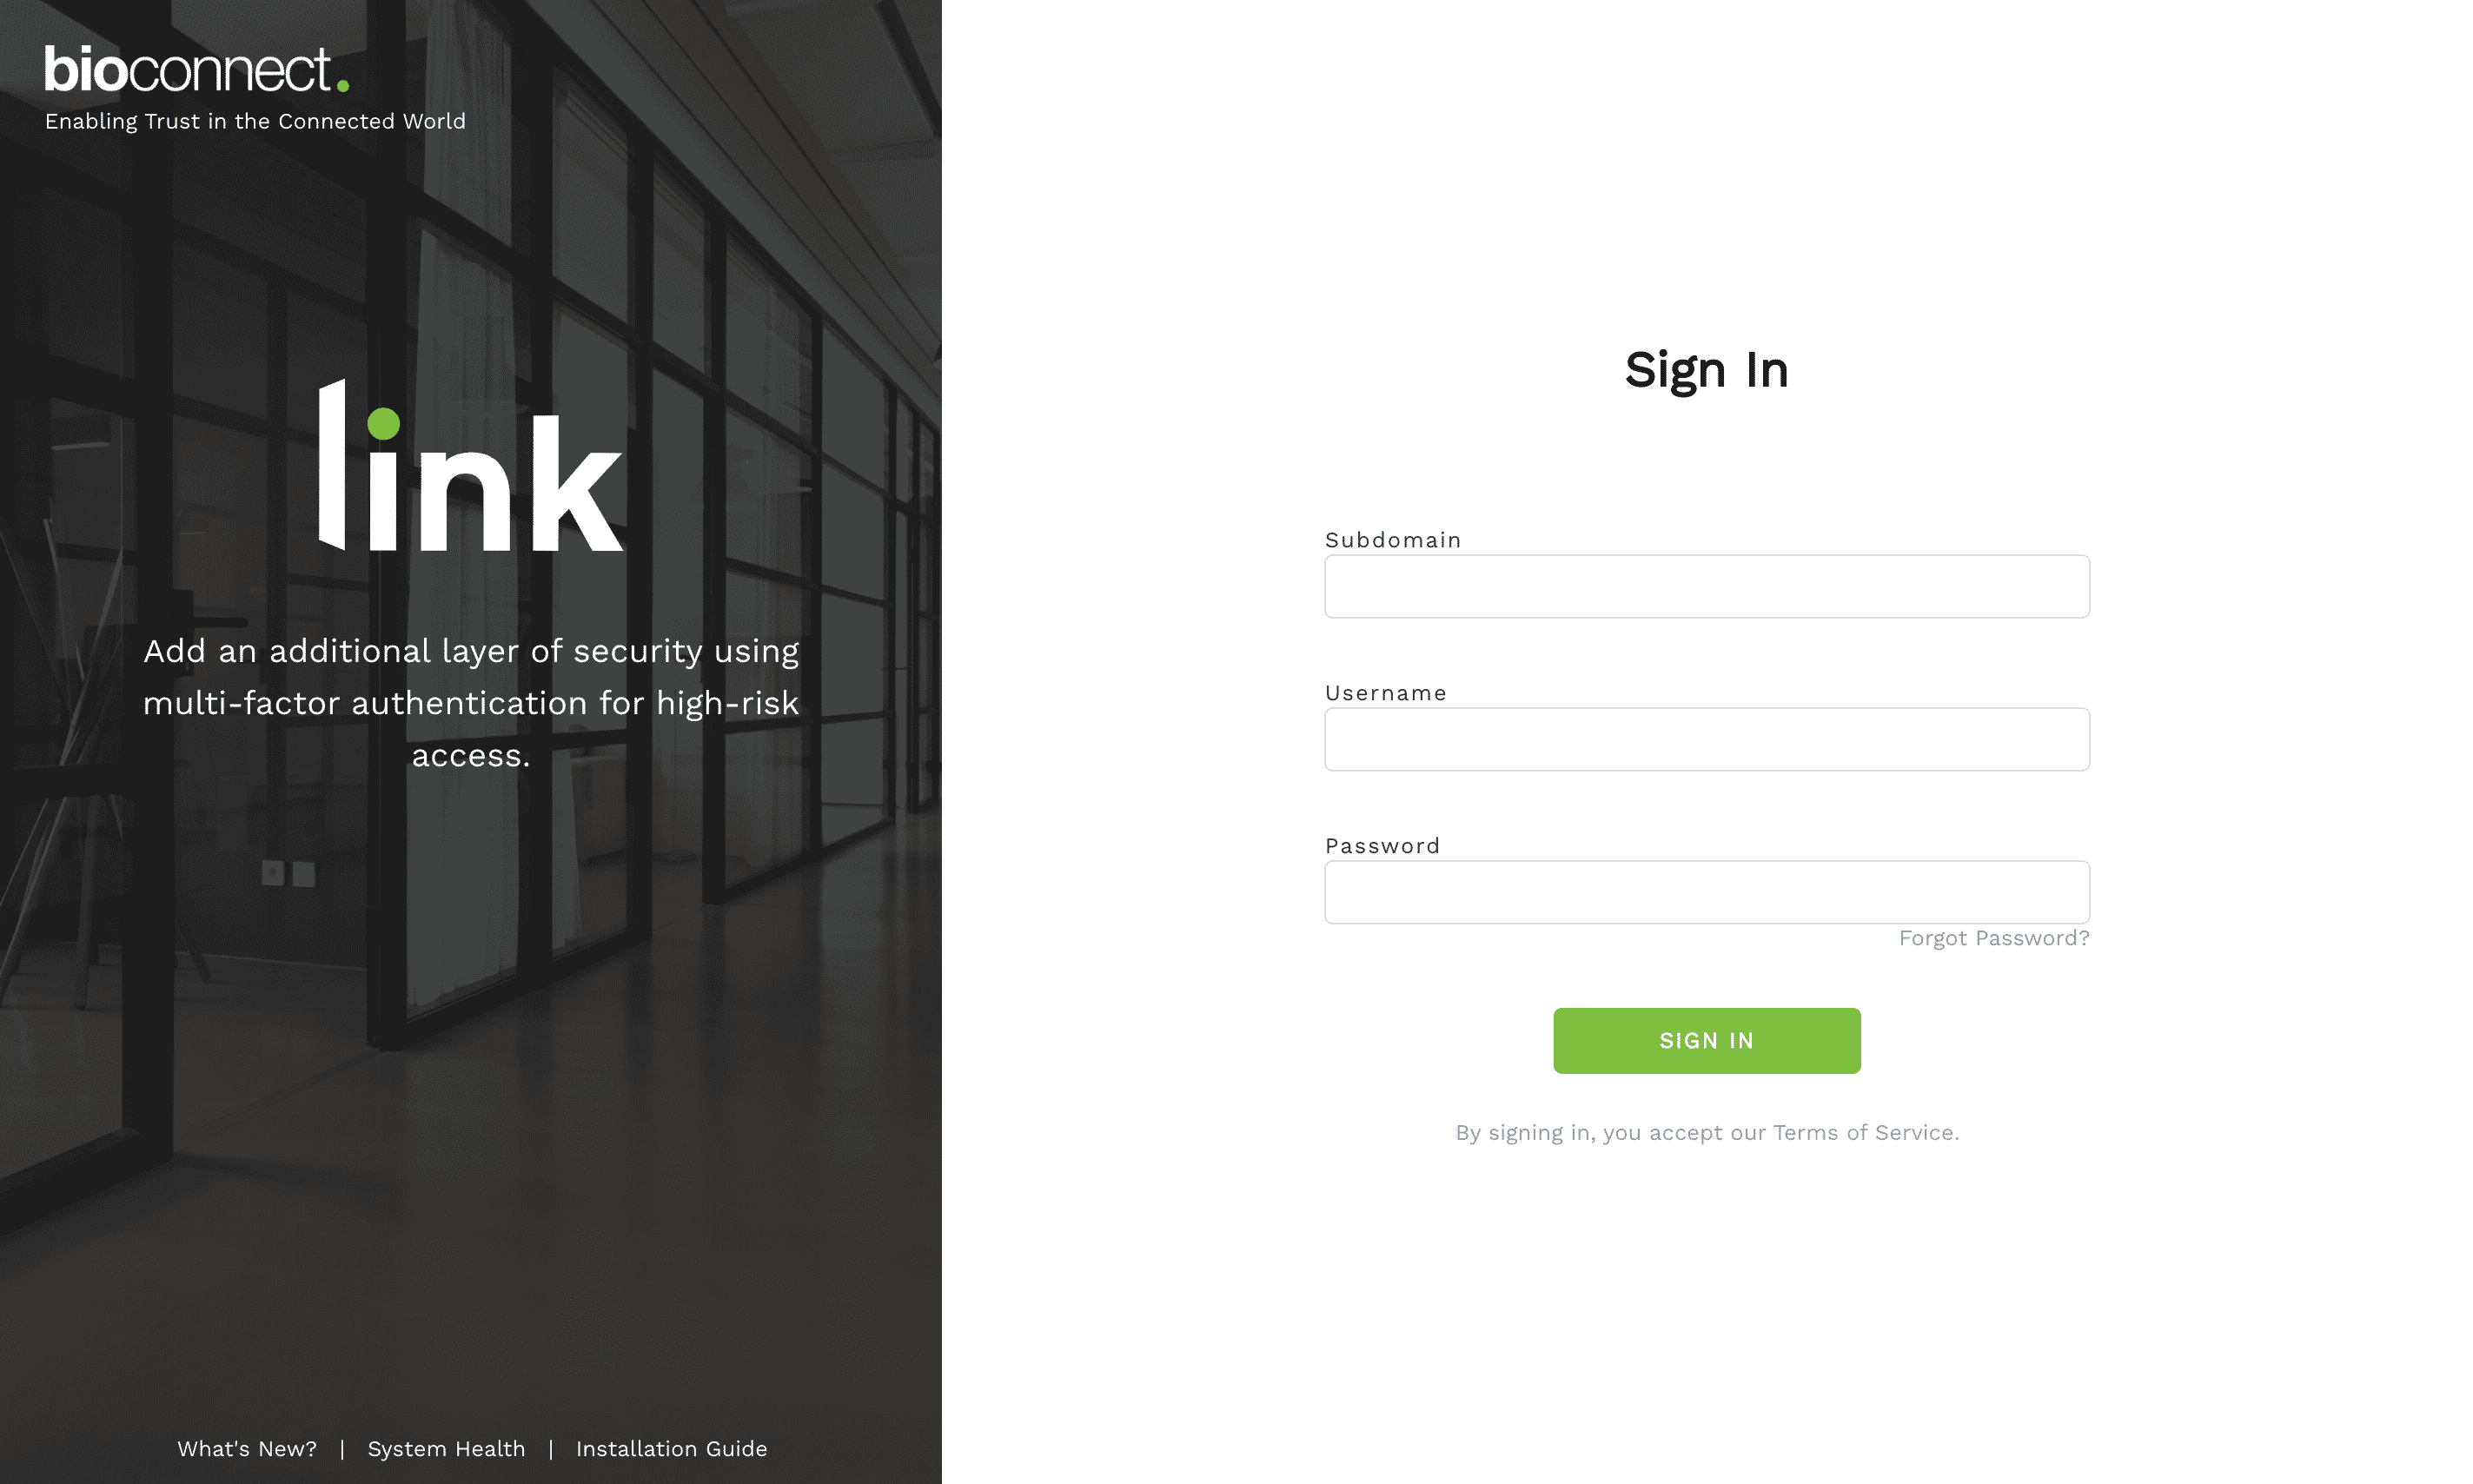
1. On a desktop or mobile device, open a browser and navigate to the BioConnect Link Console.
2. Enter login information.
Tip: Login information can be found in the email that was sent after purchasing the device. Search ‘BioConnect Link’ in your inbox to locate this.


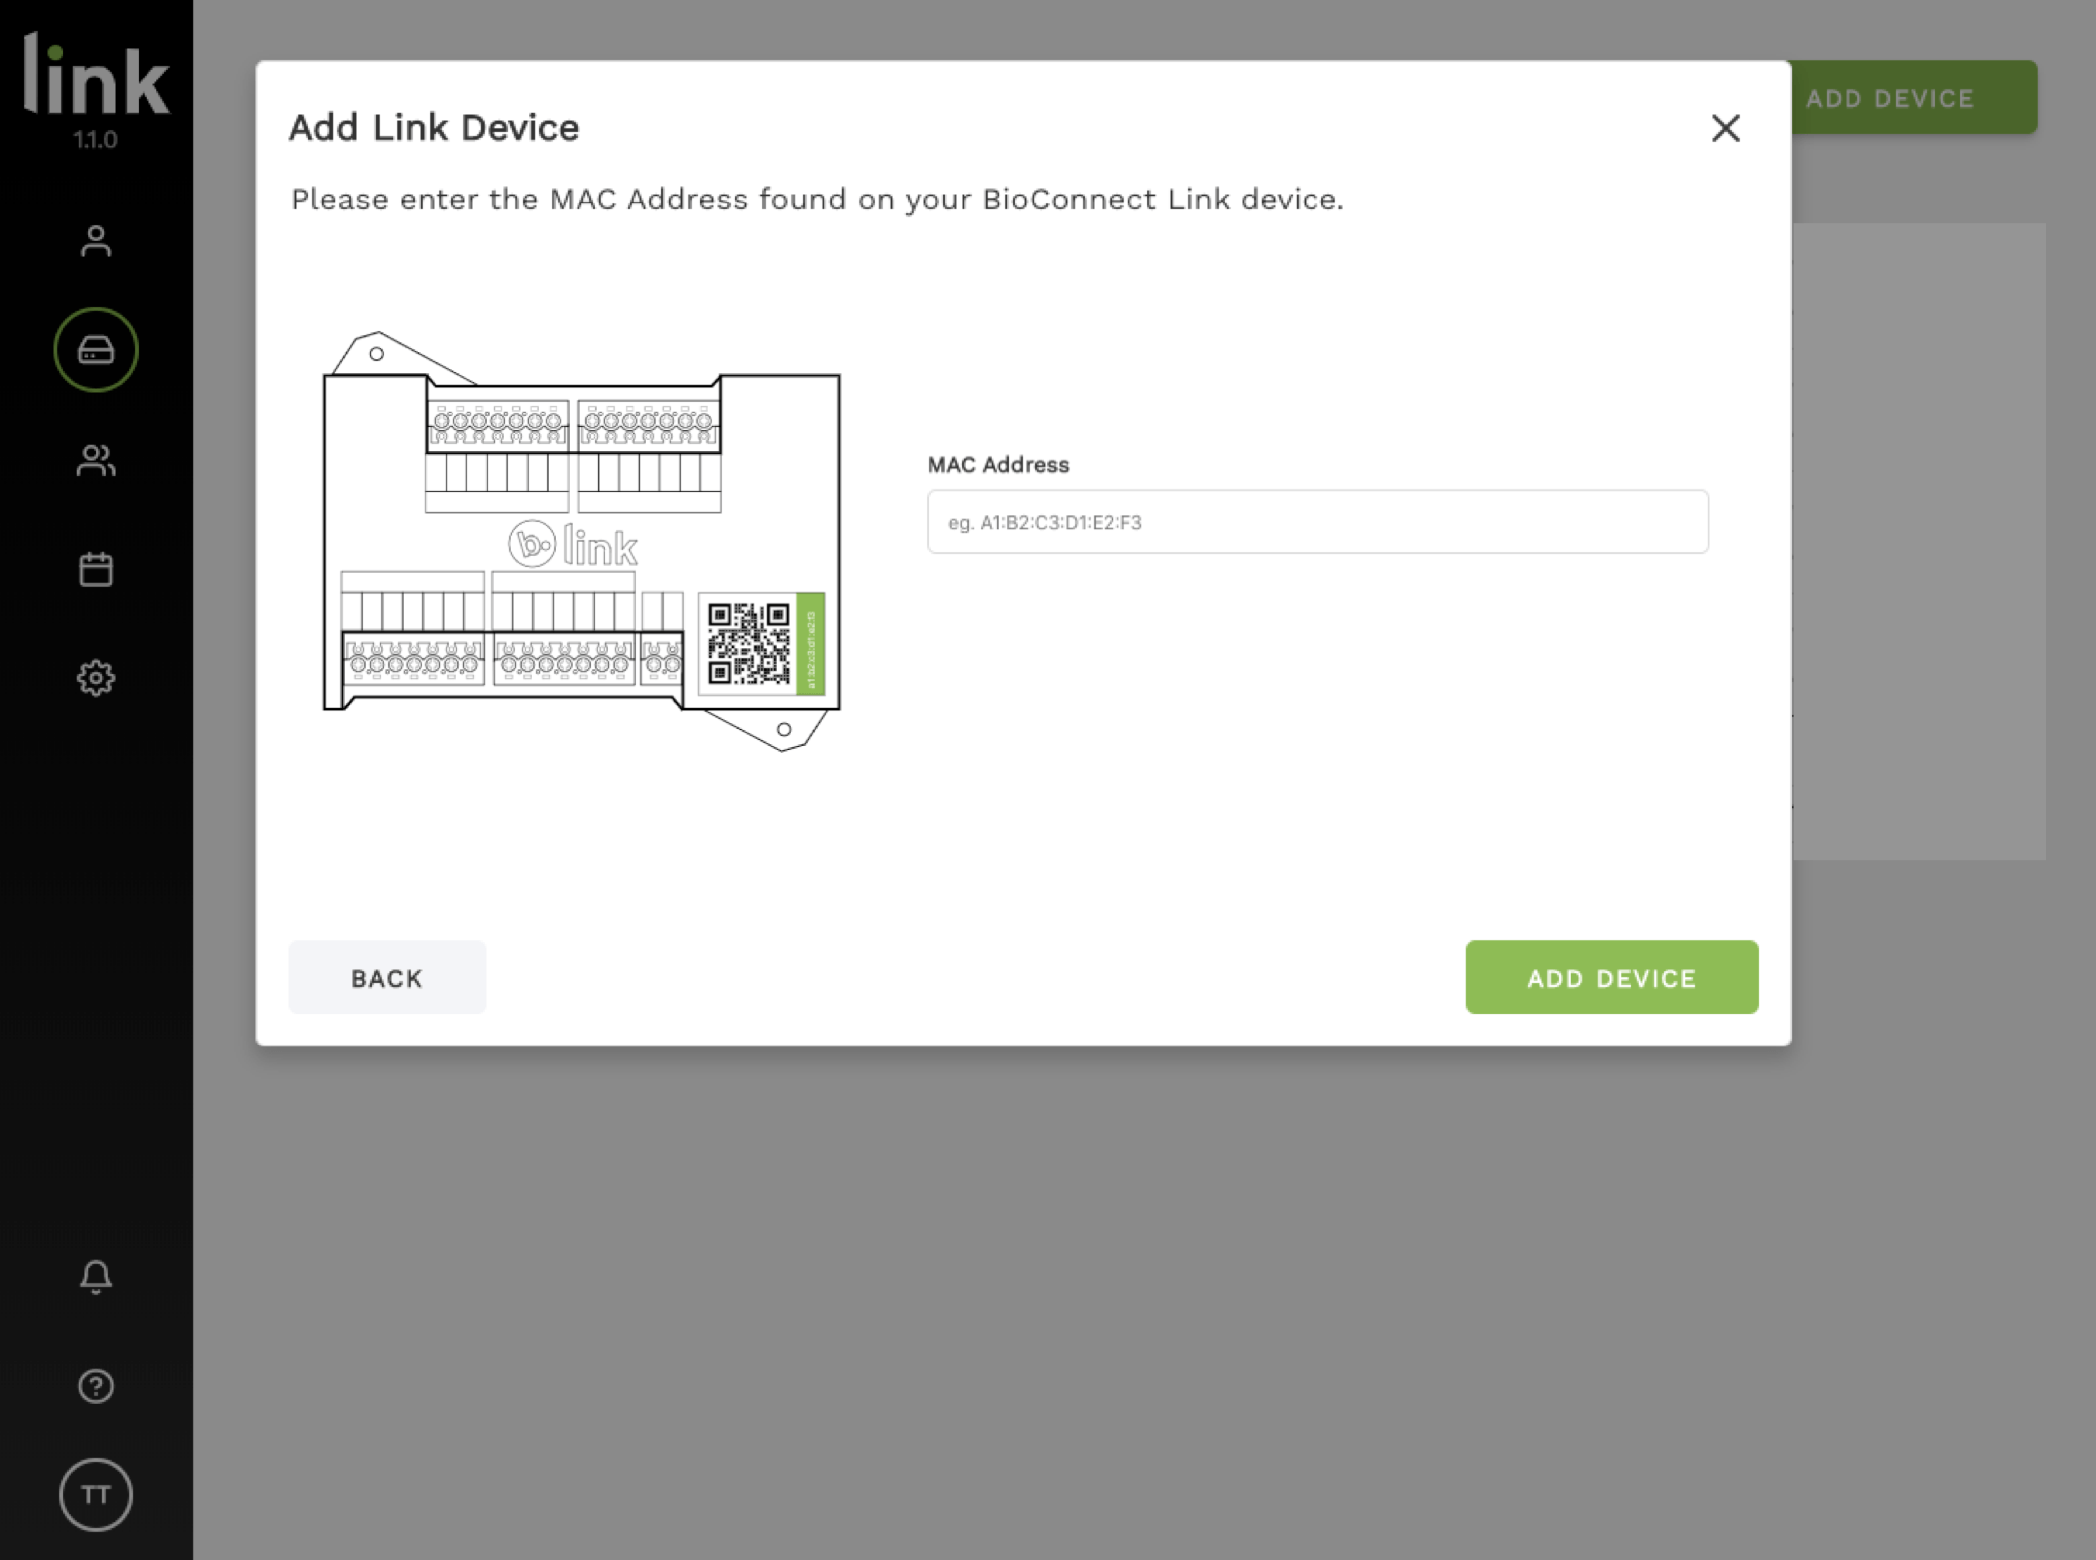
5. Enter the 12 digit key located beside the QR code sticker on your hardware and then click ‘Continue’.
6. Select ‘Safe or Key Cabinet’.

7. Give a descriptive name for this safe/key cabinet.

8. Select your safe/key cabinet authentication settings.

9. Once added, be sure to enable the device.

Configuring the Device
Each device should be configured for how you want your users to authenticate their identity.
1. Select the 3 dotted menu of the device you want to configure and click ‘Settings‘

2. Navigate to ‘Authentication Method‘ tab at the top.

3. Select the ‘Primary Authentication Method‘ drop down and choose how you want users to authenticate and select ‘Save Settings‘.

Device Alarm Set Up (Optional)
Overview
For safes and cabinets, it is particularly valuable to configure an alarm that sounds when a door is held open for a certain length of time.
This is a global setting and will be configured across all of your safes and cabinet devices.
1. Navigate to ‘Settings’ page.
2. Select ‘Device Alarm’ tab.
3. Choose the desired length of time and select ‘Update’.
Note: By default, the alarm is off.
Tip: To disable the alarm, set the alarm to 0 minutes.

Adding a User
Overview
To add users into the Link Console, you can either automatically sync them via the ACM Sync feature, or you can manually add users. To add users automatically using ACM Sync, skip to Appendix A ‘ACM Sync‘ section below.
Adding Users Manually
Here you can manually add your users to the Link Console.
1. In the BioConnect Console, navigate to the ‘User Management’ page.

3. Enter your user’s information: first name, last name, and username.

4. Set Admin Role. Most users will be added as a basic ‘User. However, if your user require additional access you can set specific roles. Group Administrators can manage groups. Account Administrators have full access to the Link console.
Note: If a user already exists, you will not be able to set their password. The user can access the console by selecting ‘Forgot Password’ on the login page.

5. If you would like to add a Card or User ID, select ‘Add Credential’. You can also do this later on – see the ‘Access Methods‘ section below.
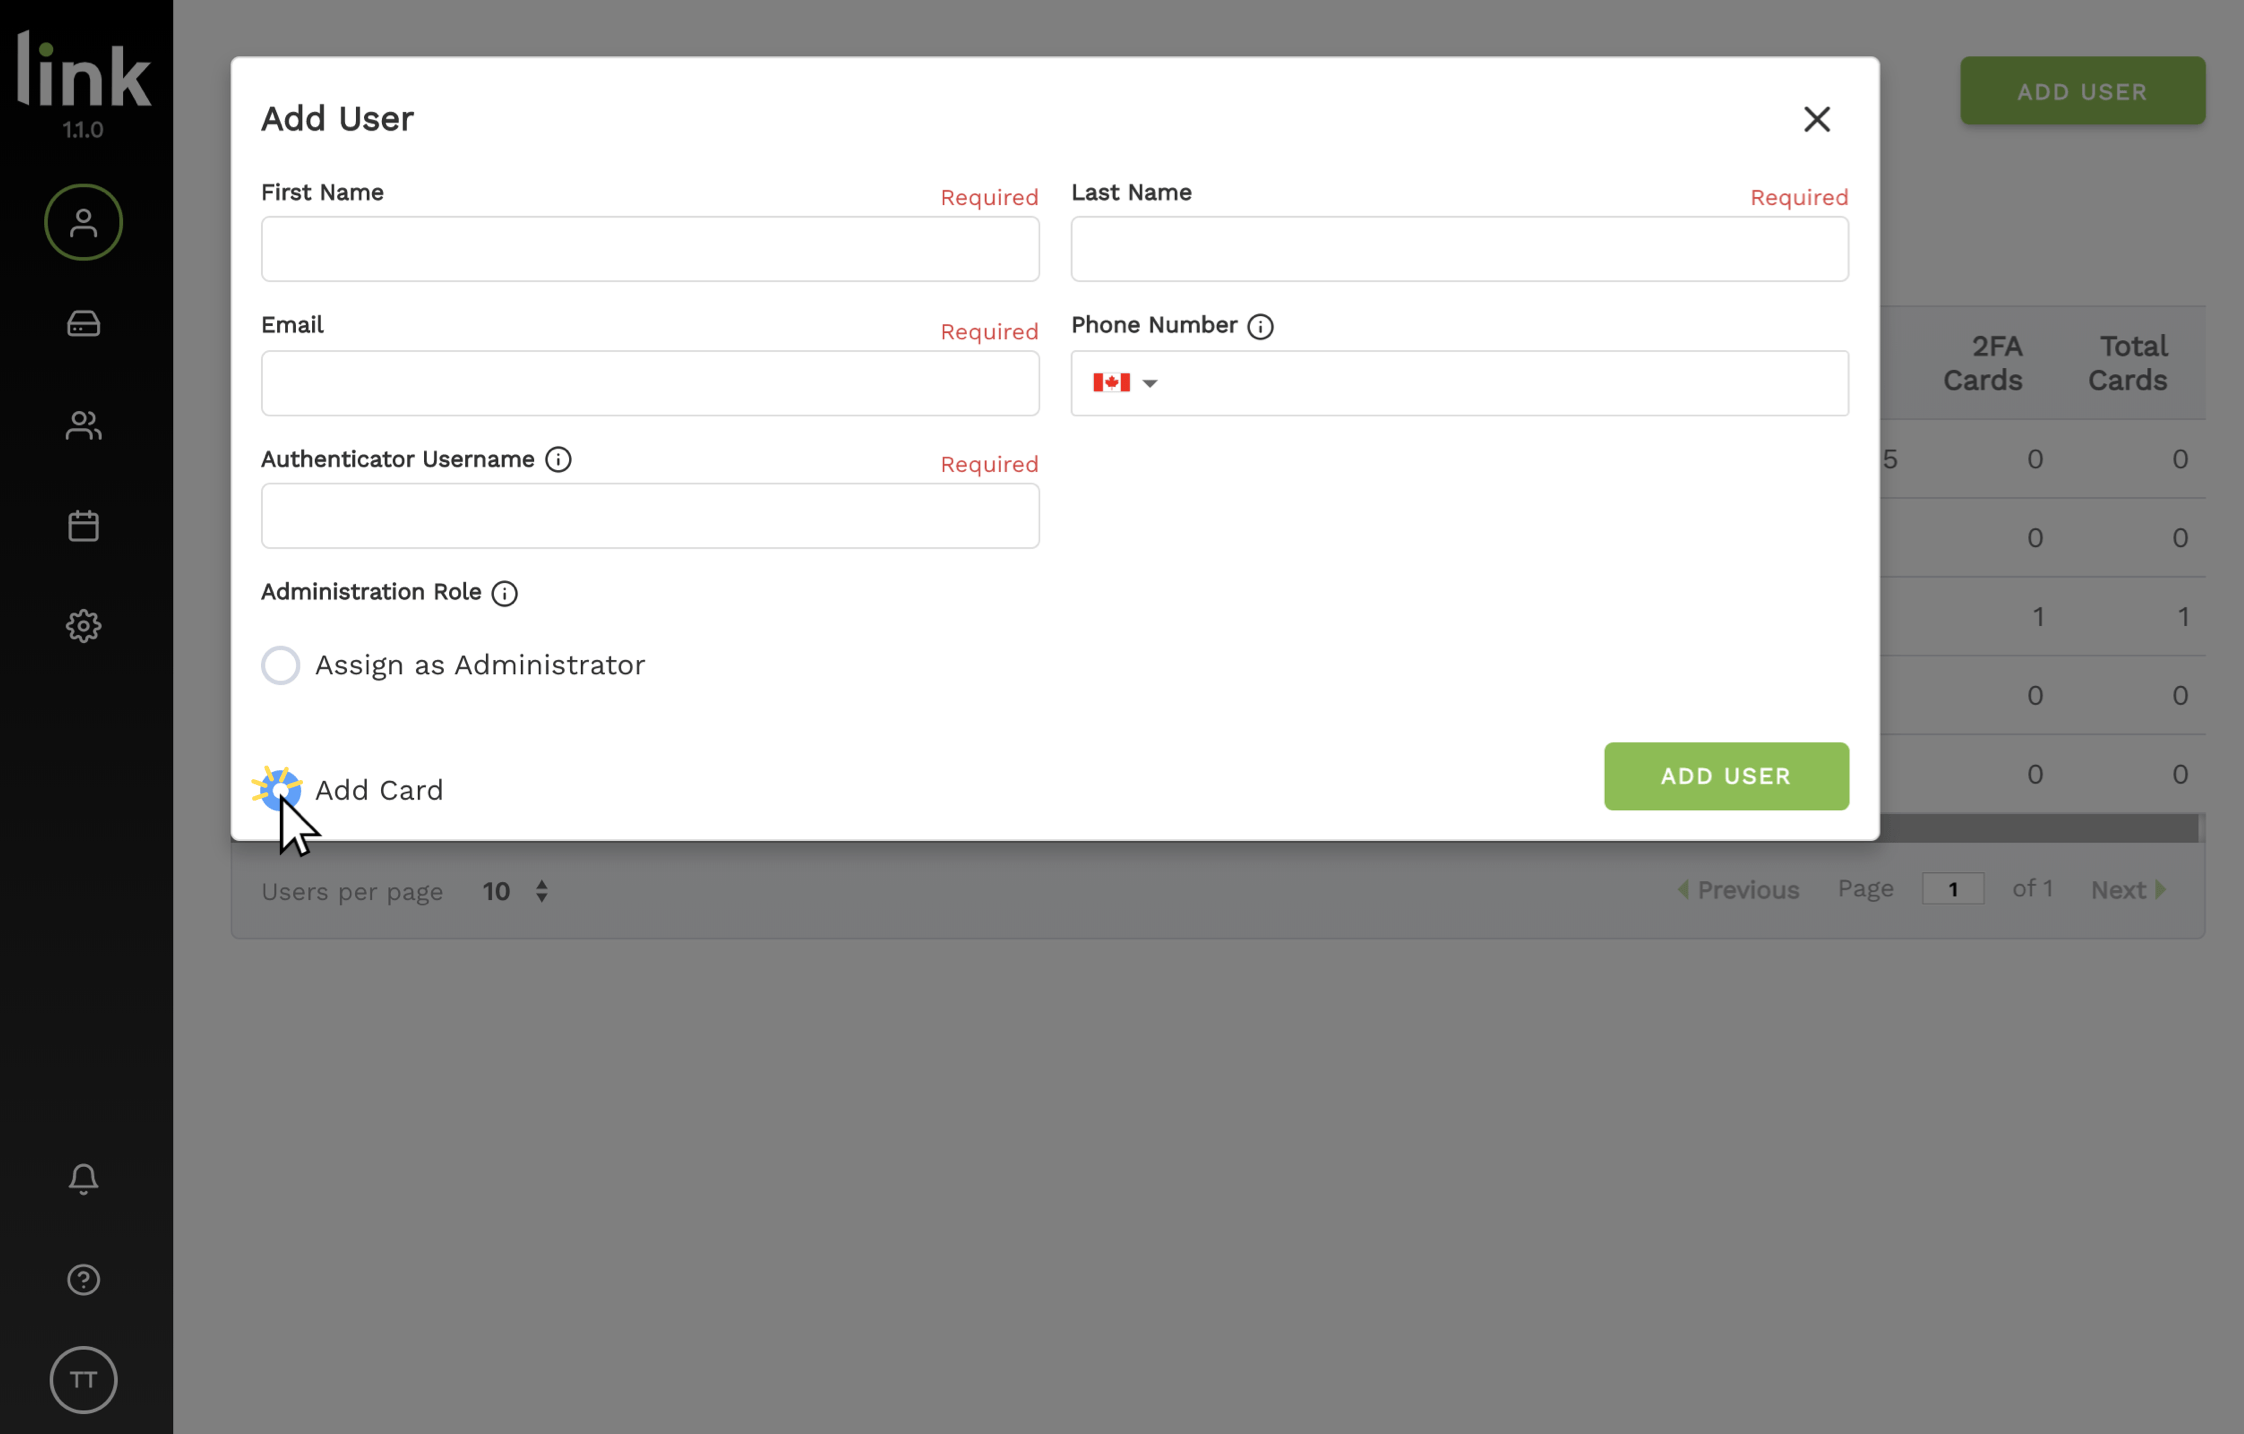
6. Add credential.
To add a card, tap the card at your device and select the ‘refresh’ icon on the Link Console.
To add a User ID, enter a unique user ID (4-6 digits) at your device and press enter. After entering the User ID, select the ‘refresh’ icon on the Link Console.
Note: If your safe is equipped with an LCD screen, when you tap your Card or enter a User ID it will say ‘Denied’ until the credential is added.

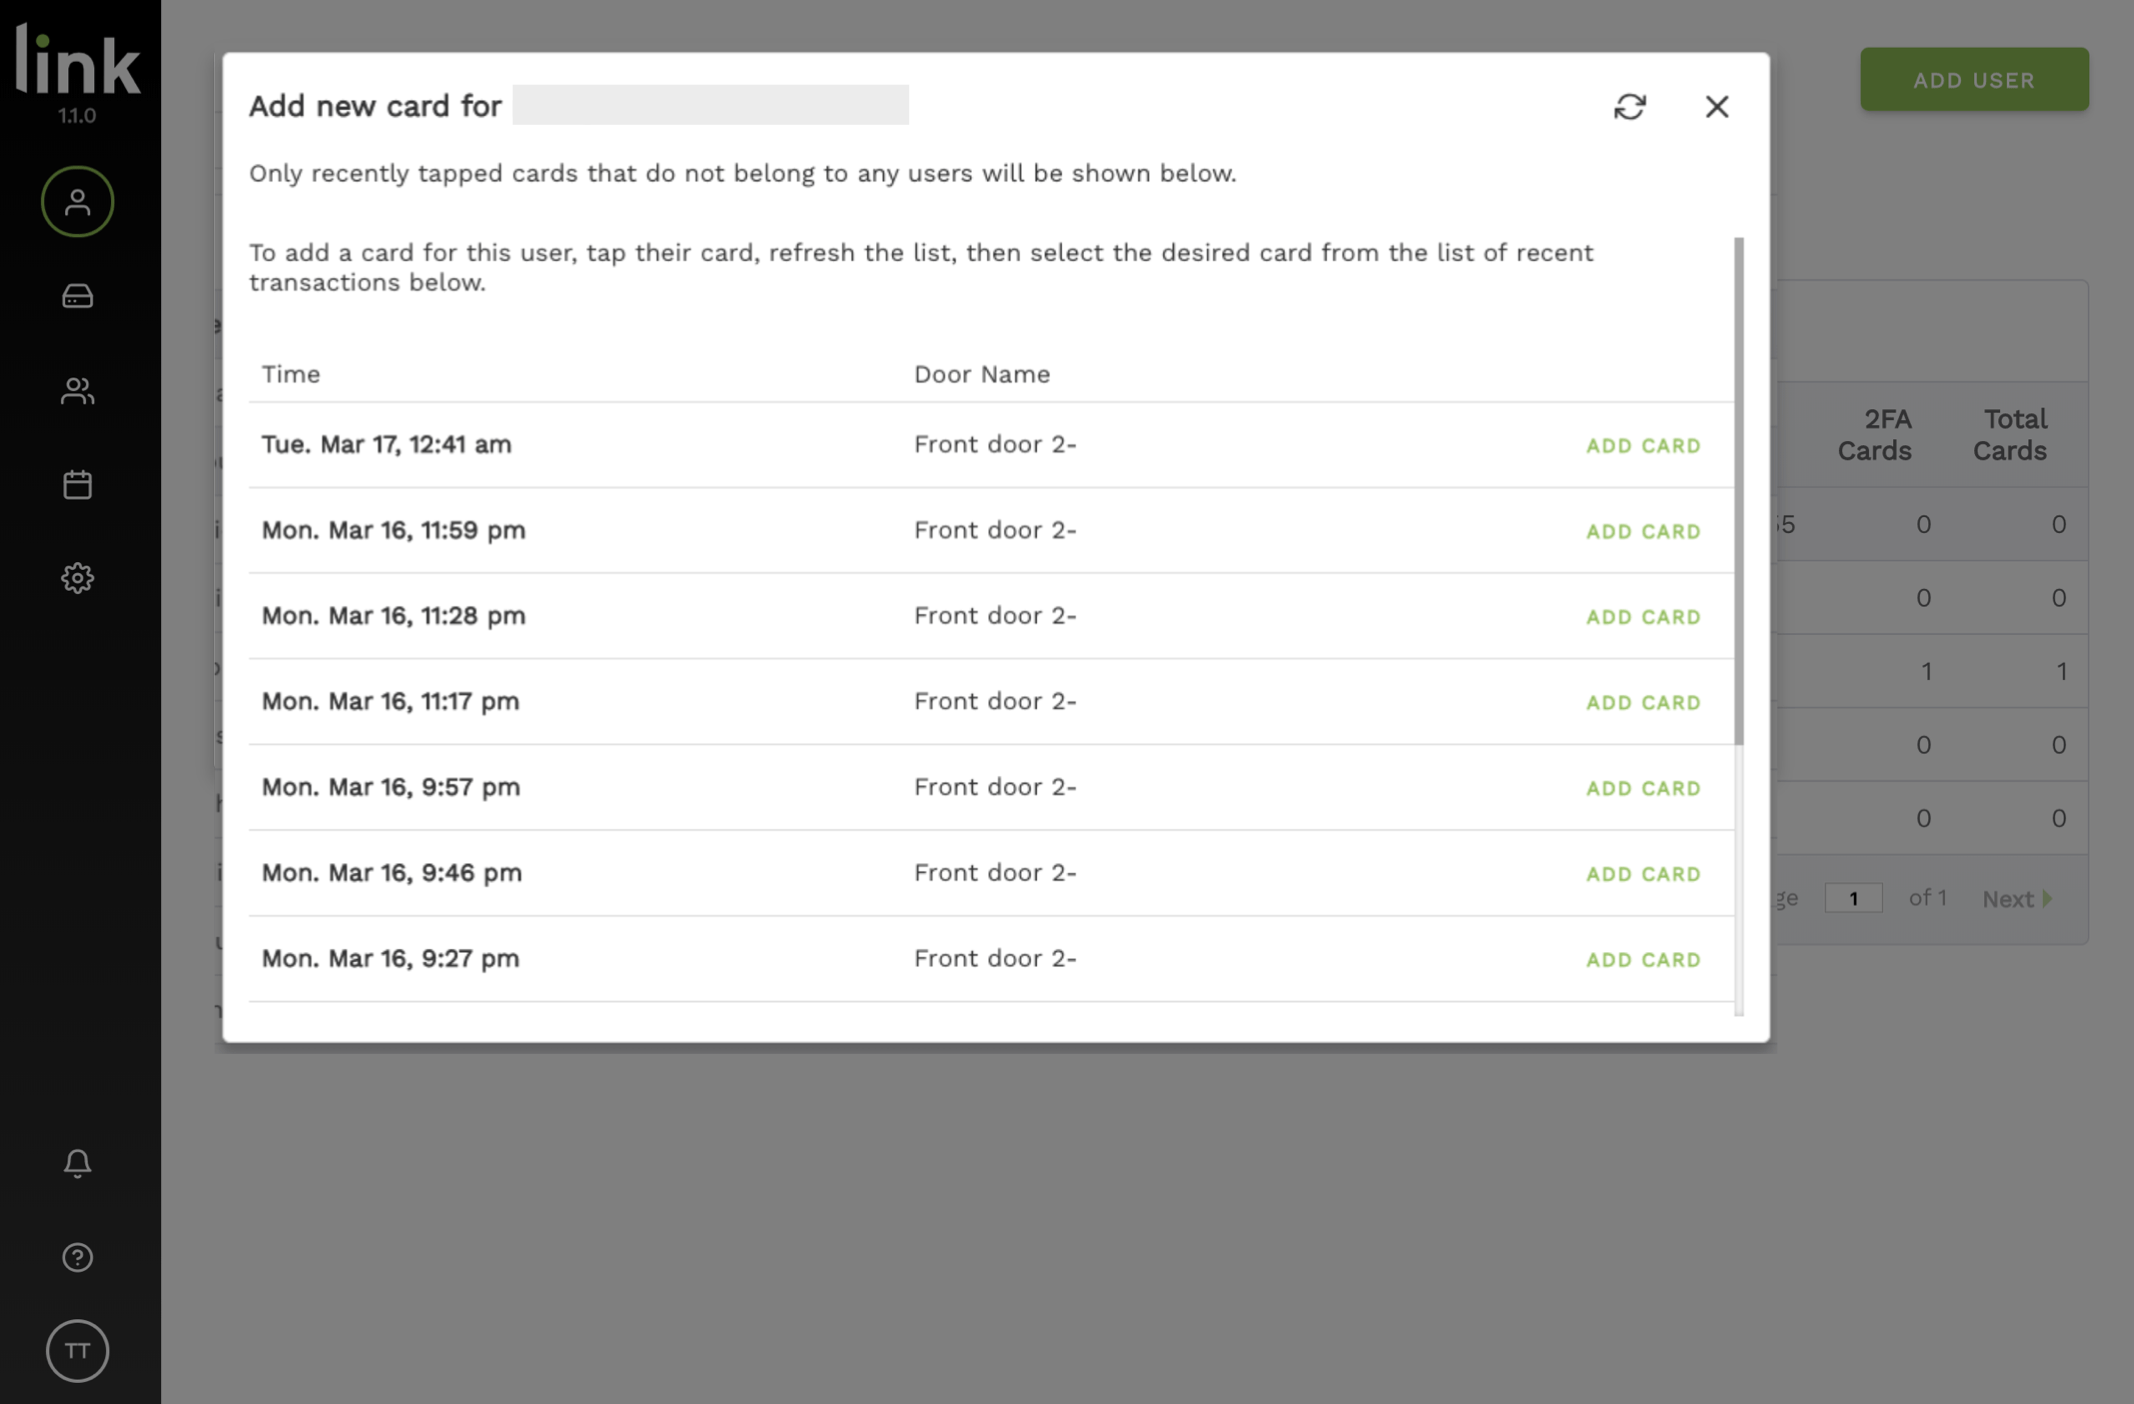
7. The system will search for the most recent transactions, where you will see the transaction from your user’s card. Once you’ve located the correct transaction, select ‘Add Card’.
Access Methods
After your MedixSafe safe key/cabinet has been installed, your software has been configured and your users have been added, you can now manage your users and credentials.
Adding a Card to an Existing User
1. Have your user scan their card at the safe.
2. Navigate to the BioConnect Console ‘User Management’ page and select the user.
3. Select ‘Manage’ and then select ‘Add Credential’

4. The system will search for the most recent transactions, where you will see the transaction from your user’s card. Once you’ve located the correct transaction, select ‘Add Card’.
- Review the time stamp of the transaction to ensure it matches with the card was scanned. The most recent transactions appear at the top.
- Review the door details – if you know the door that the card was tapped at, you can verify it in those columns.
Adding a User ID to an Existing User
1. Enter a 4-6 digit User Id code on the device PIN pad that is unique across the system and then press ‘Enter‘.
2. Navigate to the BioConnect Console ‘User Management’ page and select the User you would like to add this User ID to.
3. Select ‘Manage’ and then select ‘Add Credential’
The system will search for the most recent transactions, where you will see the User ID appear as an unknown card.
4. Confirm the time is the same time as when the User ID was entered, and select ‘Add Card’.
Adding a PIN to an Existing User
A PIN is a 4-6 digit secondary authentication method used in combination with a Card or User ID. Ex. a user can tap their card and then enter a PIN code to authenticate OR they can enter a User ID and then a PIN code to authenticate.
Note: A user must have a Card or User ID enrolled before they can create a PIN.
Important: Ensure that your safe is configured for PIN Access. See ‘Configuring an Existing Device‘ section above.
1. User enters their User ID OR taps their Card at the safes PIN Pad and presses ‘Enter‘.
Reader LED should flash rapidly blue and green.
2. User enters the PIN once and presses ‘Enter‘.
Safe will beep.
3. User enters the PIN for a second time and presses ‘Enter‘.
Safe unlocks.

1. Select the desired device and choose ‘Remote Authorize Open‘.

2. Select ‘Display Code‘.
3. If you have an HID Device (most common), enter * # # # into the device followed by the 6-digit code that has been entered. See Instructions within the console for other device options.

Group Management
After your users have been added to the system, you can now create groups to manage alerts and notifications for specific users and devices. Groups allow you to select a group of users that can access specific devices.
How to Create a User Group


Mobile Authenticator Set Up (Optional)
Overview
Your MedixSafe solution comes with an option to provide an additional level of security using a mobile device as a step-up authenticator or you can integrate an existing mobile authenticator if your organization uses one today. You are also free to not activate this optional feature and use the Card / PIN options.
1. In your browser, navigate to the BioConnect Link Console and login using your credentials.
2. Navigate to the ‘Settings’ page.


4. If you choose to use the BioConnect Mobile Authenticator, you have the option of using either a ‘Simple Yes/No’ Authentication or Biometric Authentication.
Note: If you are using BioConnect Mobile, please remember to activate it before enabling Two Factor Authentication.

Configuring a Two Factor Authentication Schedule (Optional)
If you have set up a mobile authenticator, you can set a schedule for when two-factor authentication is enabled. Customers often use this feature as an extra level of security during non-business hour access.

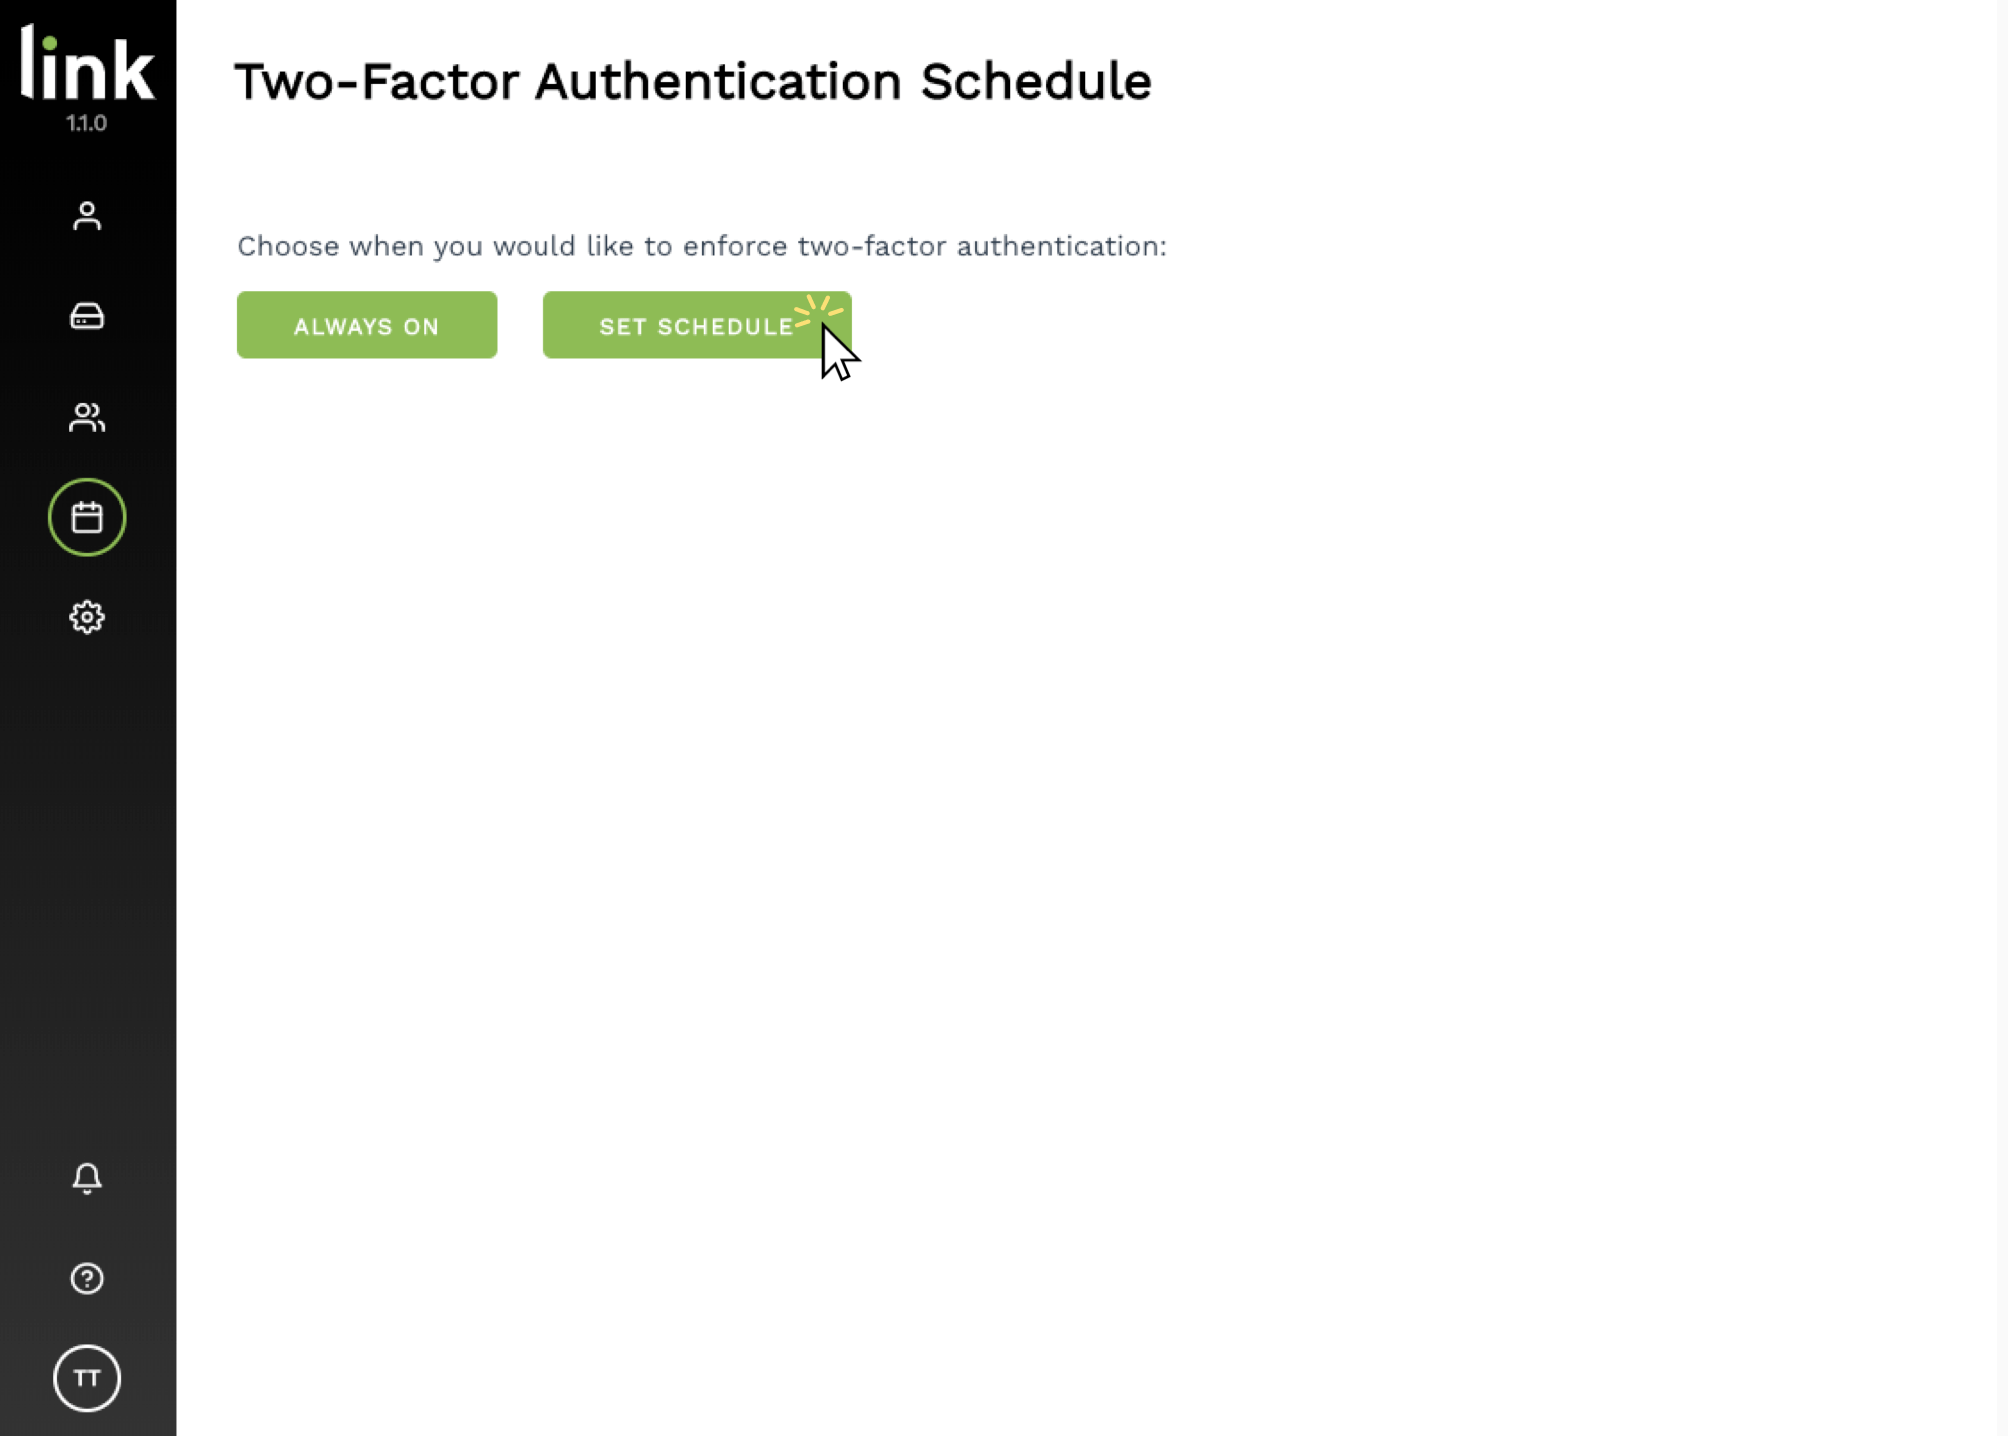
4. Enter the start time and end time that you wish to enforce step-ups.
5. Select ‘Set Schedule’ to save your schedule.

How to Enable Mobile Step Up for Users


Verifying Step Up is Enabled
Once your device has been installed, software configured, and your users and cards have been added, you can test to ensure your step up is working.
2. Press the ‘Manage’ button and select ‘Send Test Request‘ from the drop down list.
3. If the test user receives their step-up notification to their device, step-up has been successfully enabled.

Forgot Password
How to reset your password
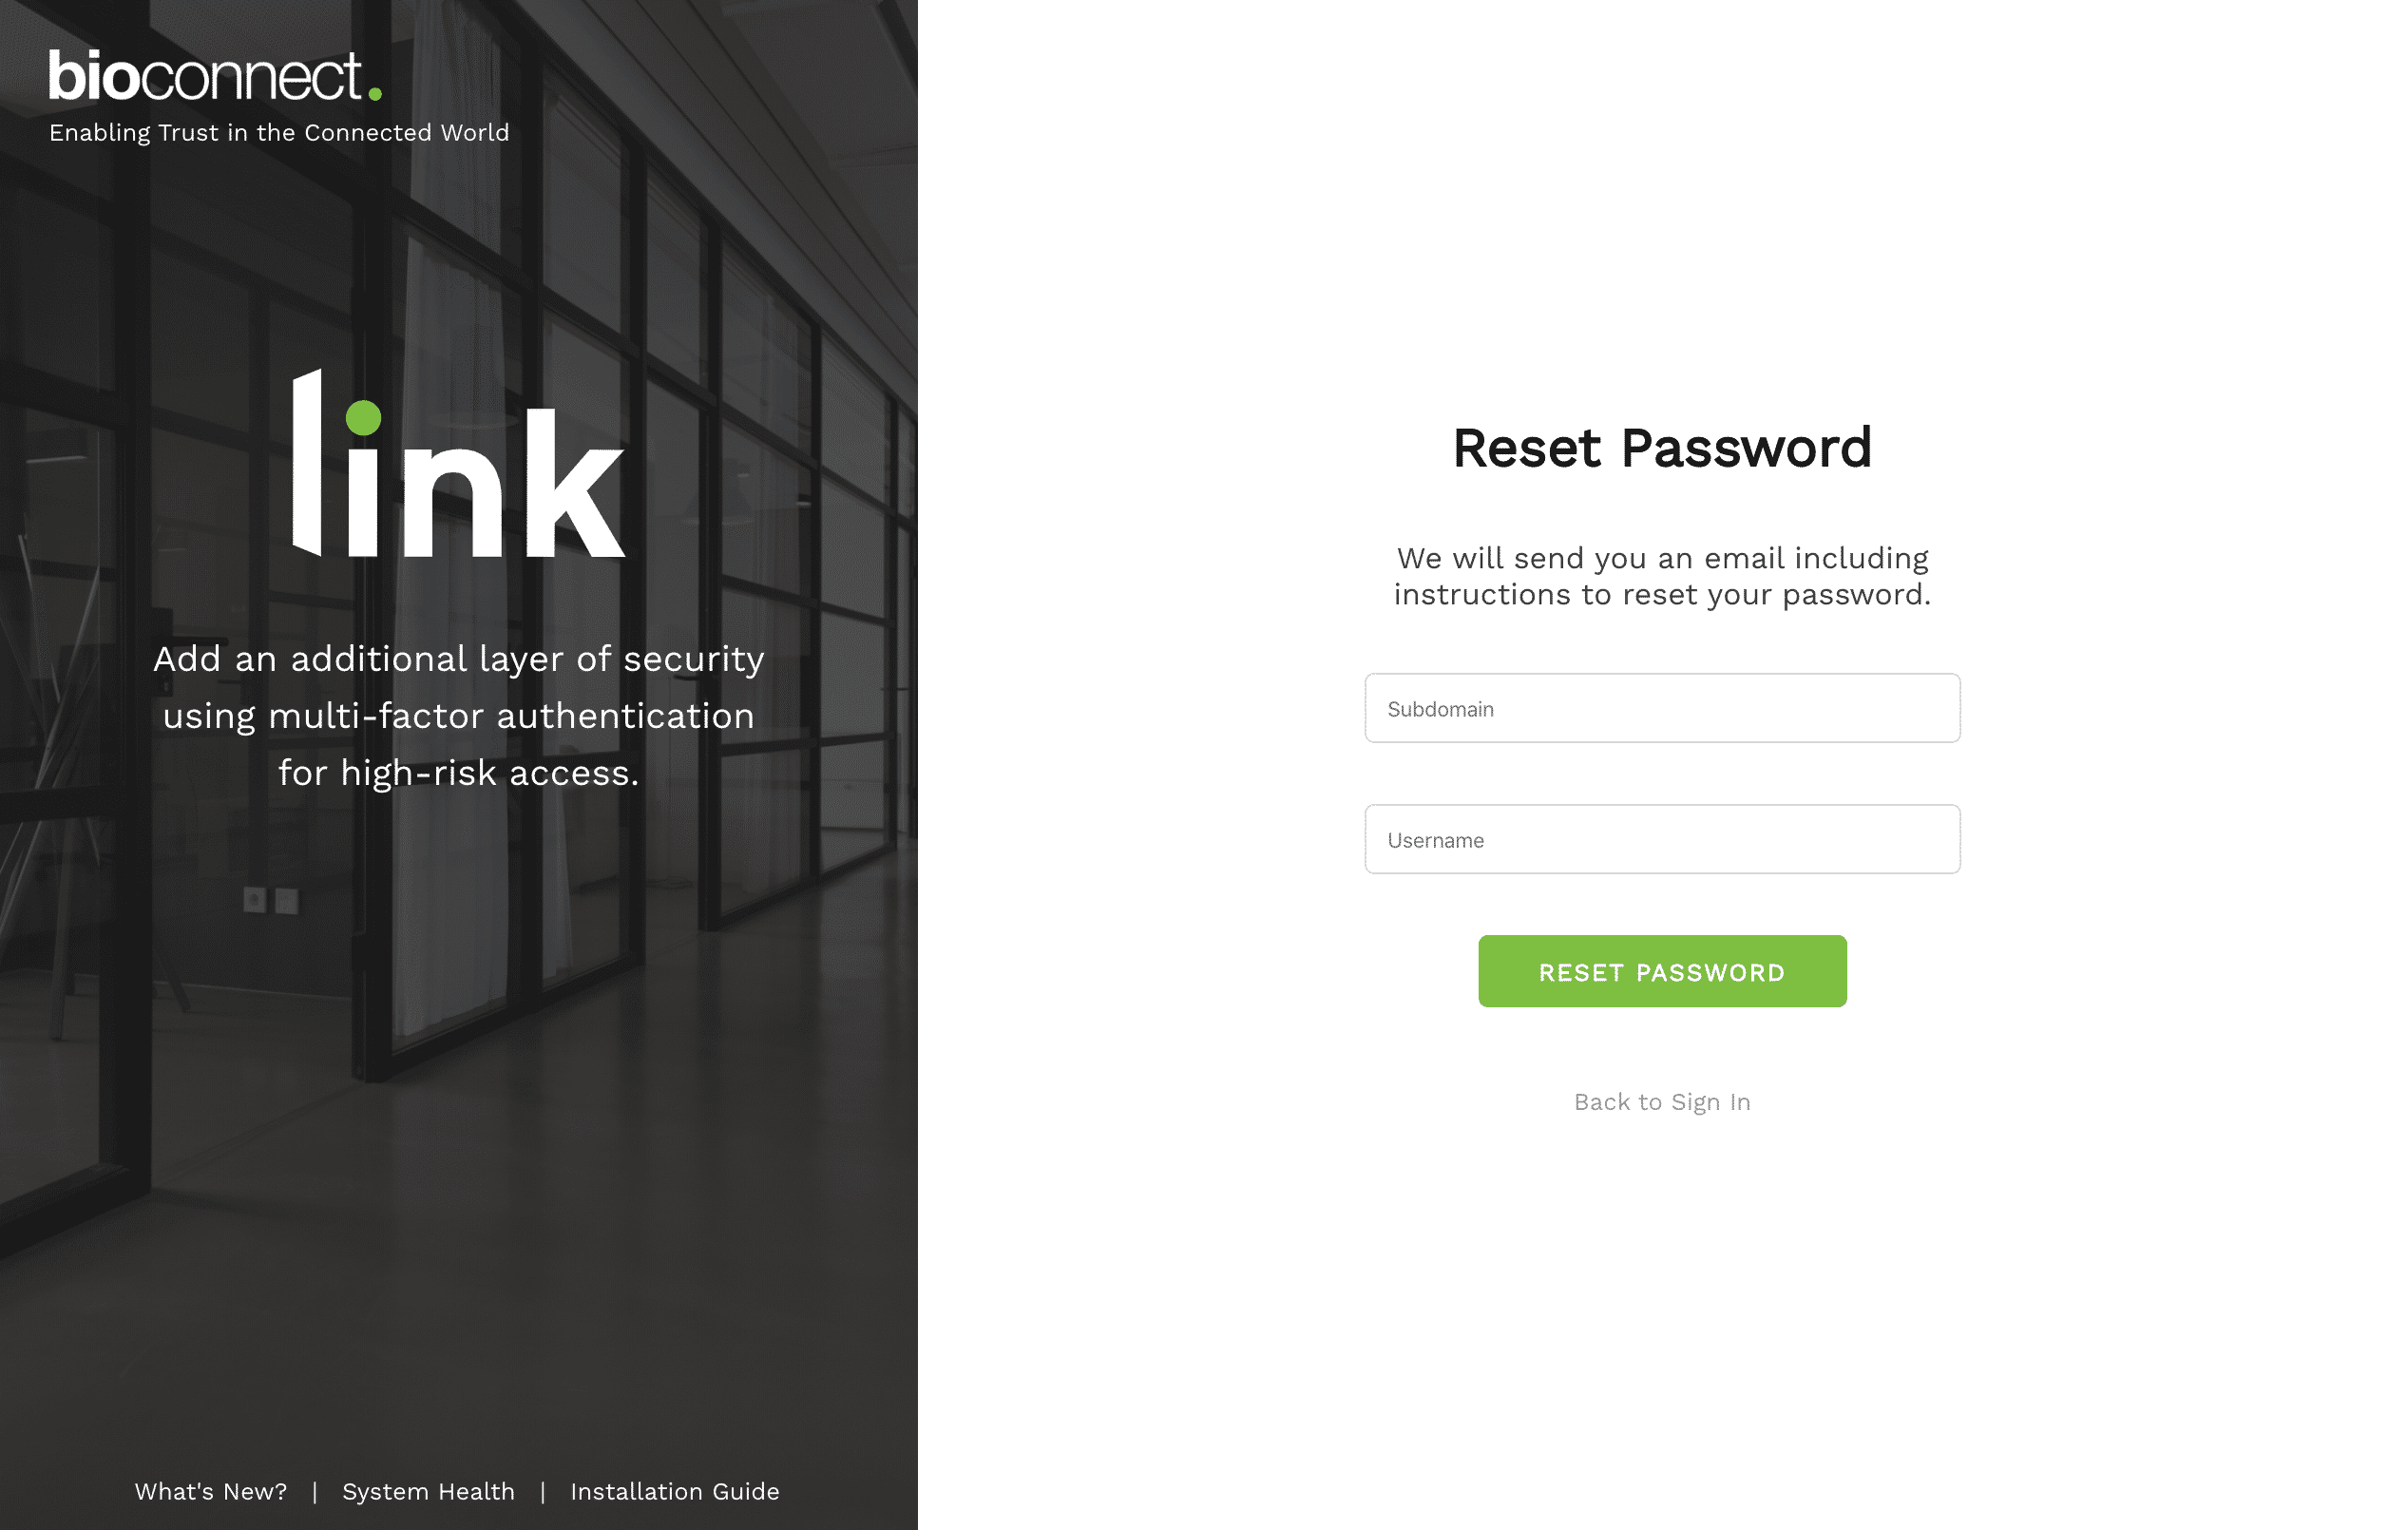
If you’ve forgotten your password, you can access your account by resetting it.
1. On the Link Console login screen, select ‘Forgot Password‘.
Appendix A:
Adding Users using ACM Sync (Optional)
The ACM Sync will automatically and securely pull users details, encrypted card details, and 3rd party IDs (second-factor authentication credentials). Card details and 3rd party IDs are required to enable two-factor authentication within Link.
Requirements
Before you begin, ensure you have all of the following available:
- Link Account Login Credentials
- ACM Server Credentials
- Knowledge of your ACM, such as where your ACM stores 3rd party IDs (eg. Active Directory credentials).
To use ACM Sync, Contact Us for the Install File.
Installing the ACM Sync
1. Run the ACM Sync installer and follow the on screen prompts.
Important: Ensure to install on a network that can access your ACM server.
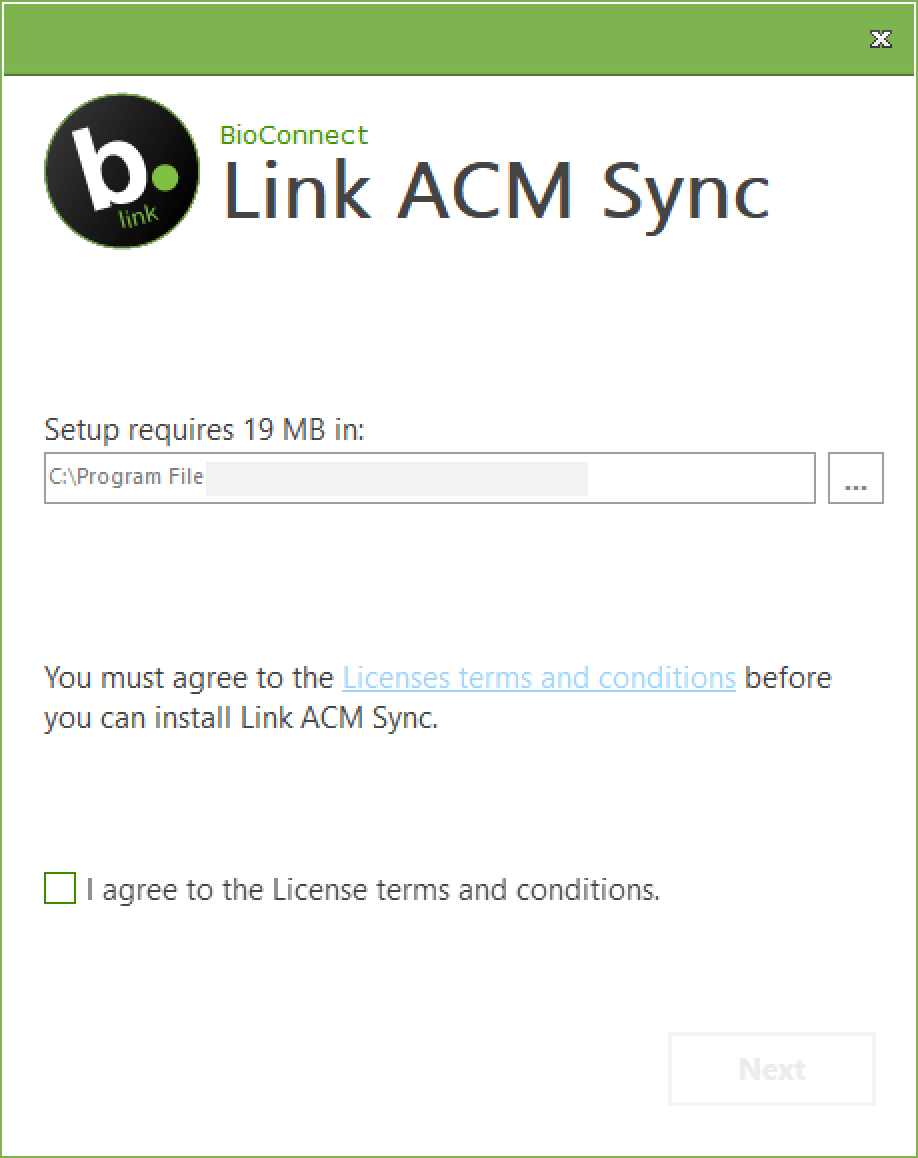
2. Review the terms and conditions and choose a download location.
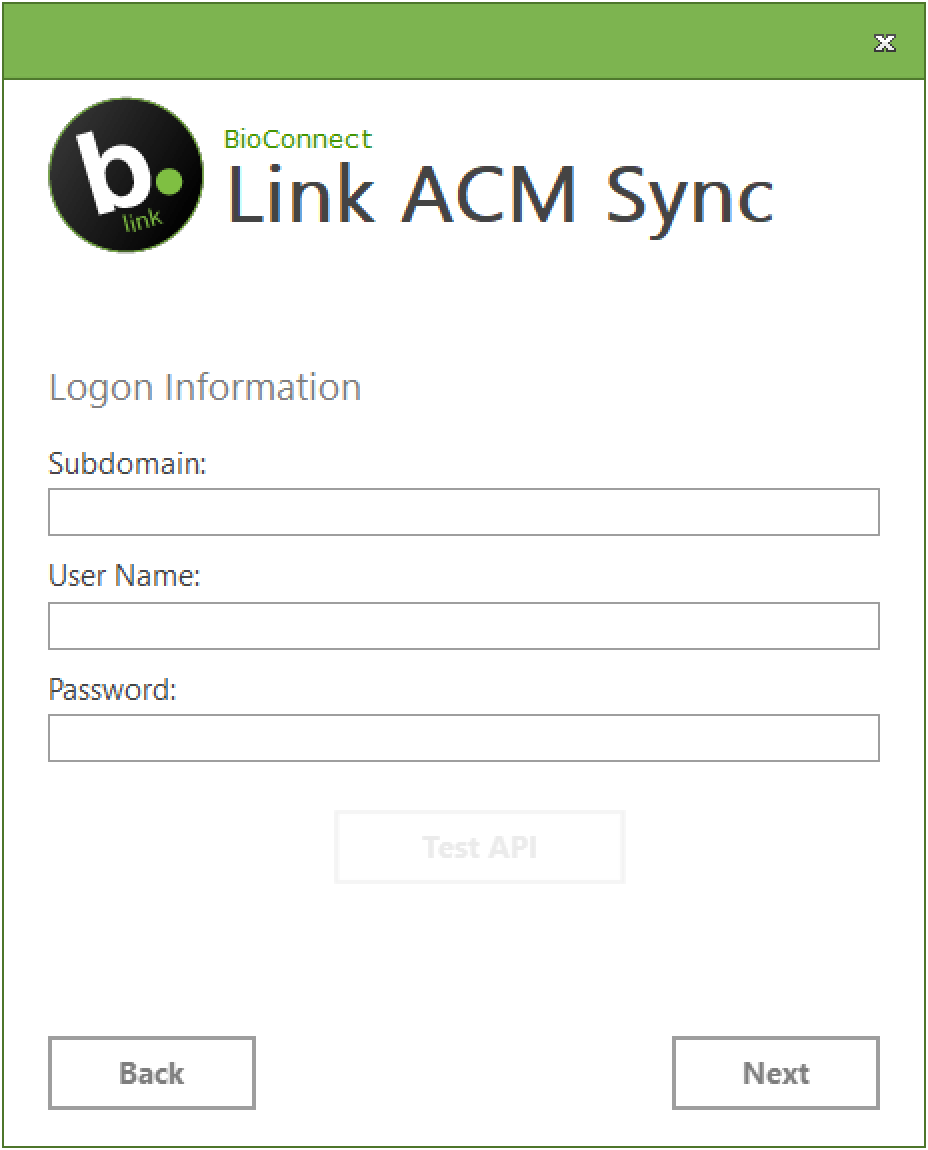
3. Enter credentials and then test the connection to the Link Cloud by selecting ‘Test API‘.
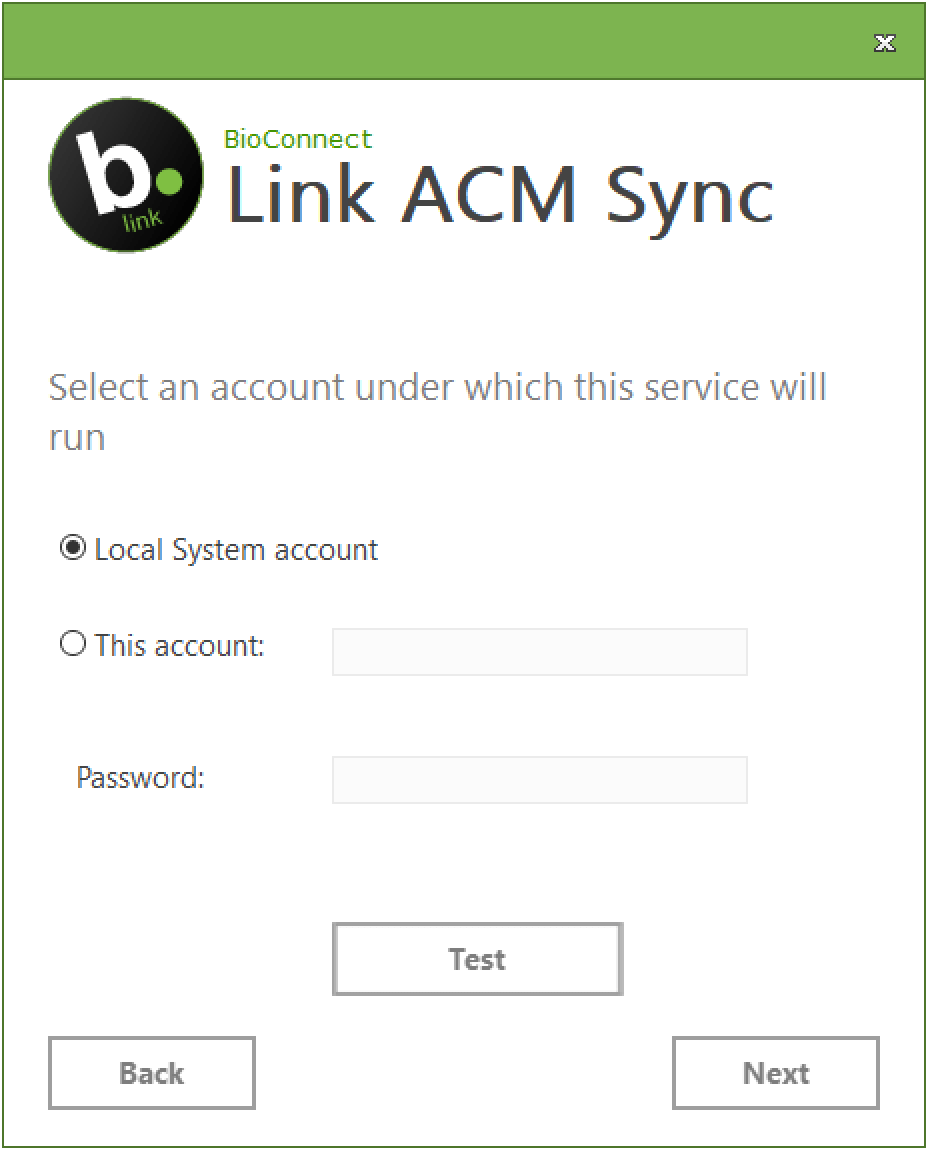
4. Choose the account under which the ACM Sync service will run.
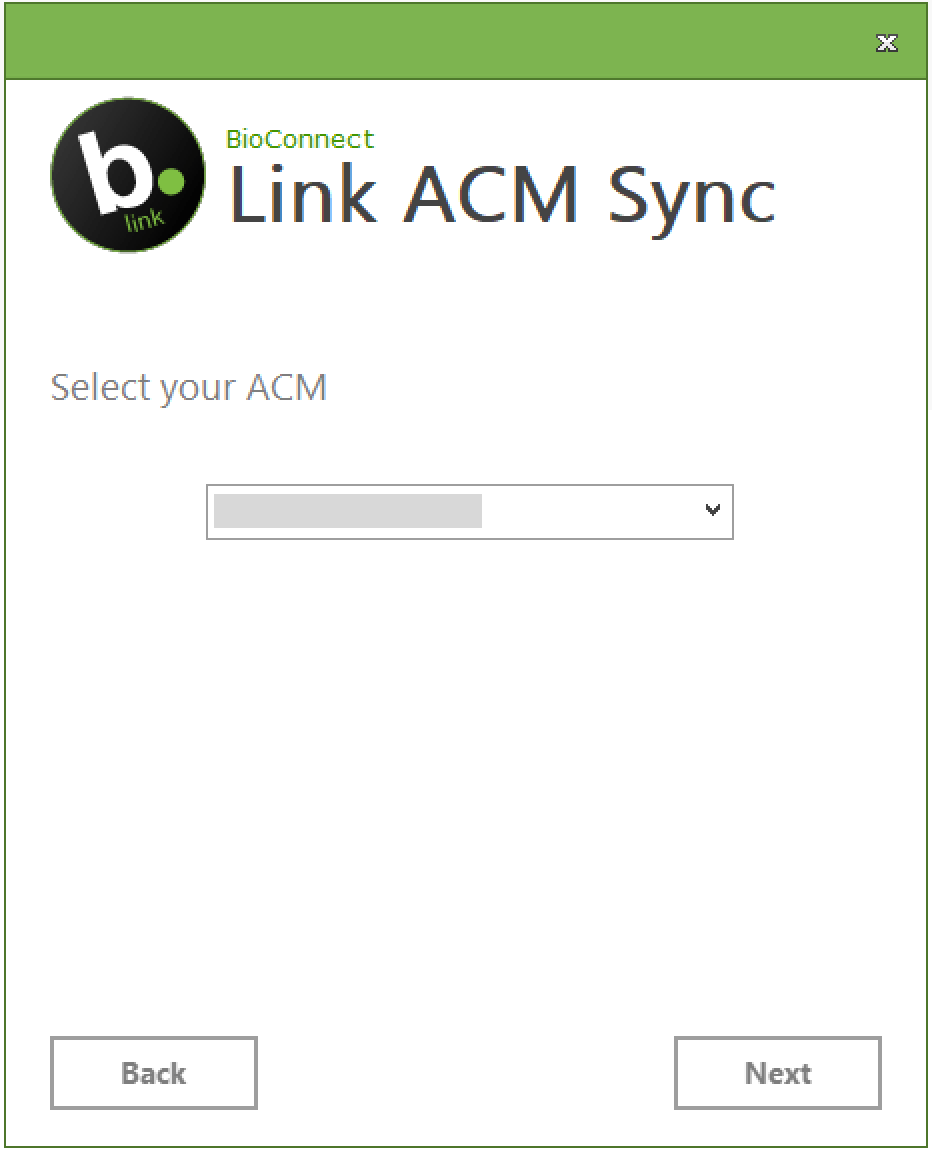
5. Select your ACM and provide credentials to connect to your ACM.
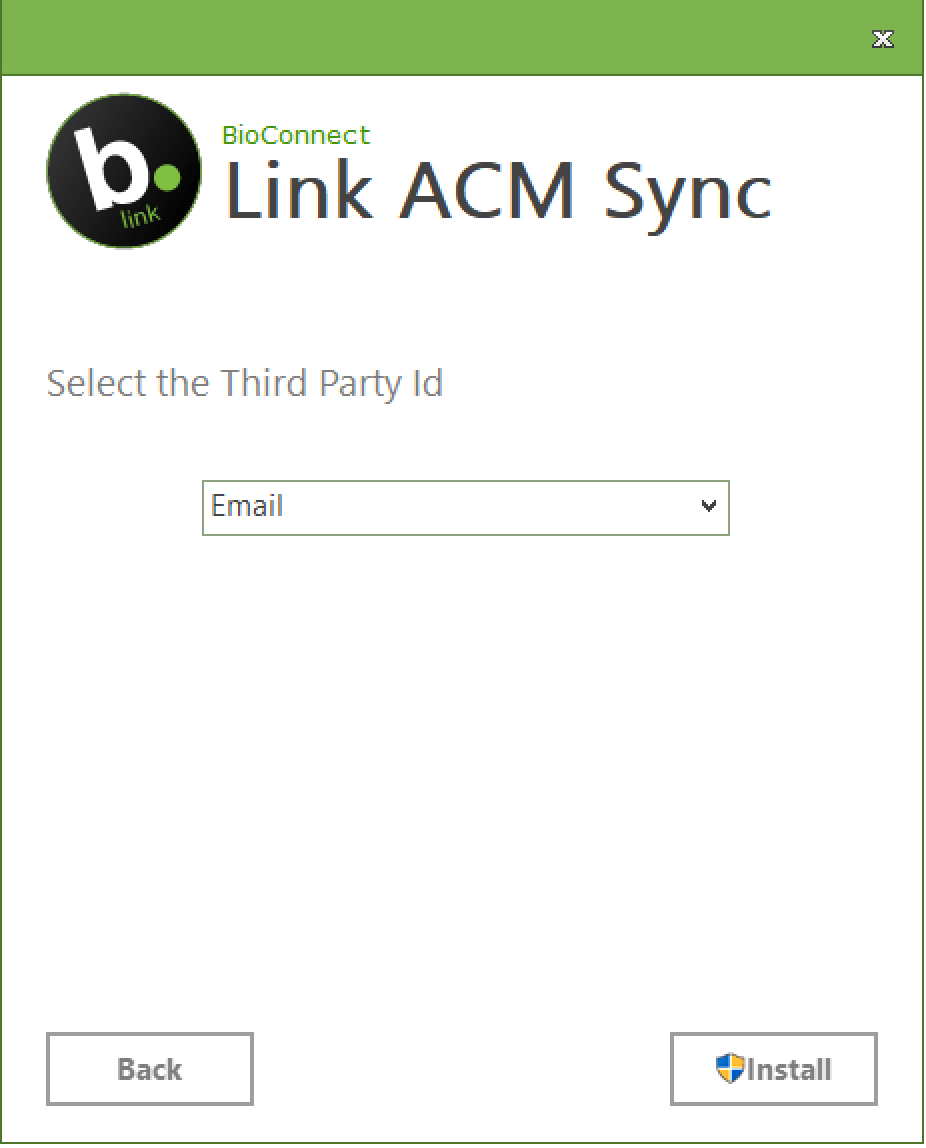
6. Select where the 3rd Party ID is stored and click ‘Install‘.
7. Once the installation is complete, the ACM Sync will begin to automatically sync users every 5 minutes. To ensure the installation was successful, confirm that users have been added to the Link Console ‘User Management‘ page.
Note: A first time sync may take more time depending on the size of your database.